
The geotechnical centrifuge is a laboratory where researchers perform experiments by remote control in an increased gravity field. Researchers at UC Davis most often perform shaking table tests and/or reaction wall/field loading type tests on models while they spin. Experimental protocols for the 9-m and 1-m radius centrifuges are similar in structure but differ dramatically in complexity.
Pretest planning: The first stage in the experimental protocol is the Experiment Conceptual Design. This stage is typically an iterative collaboration between the project PI, research team, and CGM senior personnel. During this phase, we match research objectives with experimental capabilities and available resources. In most projects, we are asked to do something different than we have done before and hence need to confirm the feasibility of new developments.
The research team then develops and presents a written Experimental Plan to the CGM prior to arrival on site. The Experimental Plan details plans for model construction, instrumentation, and testing. The CGM uses the plan to schedule facility resources and guide the development of any required custom testing capabilities. All custom testing capabilities must be complete before model construction begins.
Upon arrival on site, researchers present their Experimental Plan at a meeting of the CGM staff and any other research teams already on site. This meeting facilitates teamwork, identifies critical path elements and any conflicting needs of different research teams, ensures best practices, is an opportunity for discussion of safety and risks, and ensures roles and responsibilities are well understood. The research team may then begin building their model to be tested on the centrifuge.
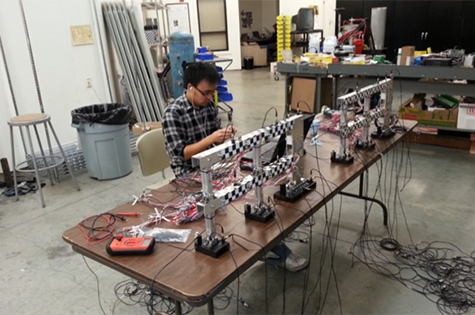
Sensors and instrumentation: Researchers often begin model construction in the Electronics and Calibration Room (clean shop) where they check out, calibrate and verify sensors from the CGM inventory. Teams often install and test their own custom strain gauge bridges or other custom sensors on model structures. The work on electronics, instrumentation, and calibration can last anywhere from two days for simple experiments to a month or two if many strain-gauge bridges are installed, wired, and calibrated by a small team or individual.
Work in the model prep room: Placing soil and sensors in a model container is done in the model preparation room. Sand is generally placed at a controlled density using pluviators. Clay is most often consolidated from slurry using one of our hydraulic presses. The soil profile is carefully constructed over the course of days to weeks. Researchers install and document locations of dozens of sensors within the soil mass while they fill the container. Researchers then install any model structures (e.g., a model building with model foundations in the soil), mount sensor racks, and place sensors on the structures and container. Researchers must complete all possible tasks in the model preparation room before the model is moved onto the arm. If a team identifies a last-minute modification they wish to make, their model waits in the model preparation room while they complete the modification. We have found that this rule reduces on-arm delays when teams are building models in parallel because it allows the second team to leapfrog the first team. Model construction can range from two to eight weeks for the 9-m centrifuge.
Final work on the centrifuge arm: After moving the assembled model to the centrifuge, the sample may be saturated, instrument racks installed and adjusted, and sensors connected to the DAQ. Users verify each sensor and each DAQ connection as part of their preparation protocol. The on-arm preparation stage typically requires three to ten days for the 9-m centrifuge.
Spinning and testing the model: Once the model is prepped for flight, the centrifuge experiment may be executed. The test protocol involves increasing the centrifuge speed to the target scaling level, performing a series of site characterization studies (e.g., cone penetration tests, bender element tests), and executing a series of simulated seismic events. In non-seismic tests, model structures may be loaded statically or cyclically using servo-hydraulic actuators. Spinning up to the target centrifugal acceleration takes about an hour, and each event in the experiment typically takes 30 minutes to an hour depending on how much interaction in decision making is required to proceed to the next stage of the experiment. Researchers are encouraged to check that their instruments continue to function reliably at each stage of the experiment. Each spin consist of a series of several simulated earthquake events and/or site characterization tests and each project often requires multiple spins spanning a few days to a few weeks on the 9-m centrifuge.
Dissection: Following the centrifuge test, users dissect the model in a process that typically takes one to two weeks for the 9-m centrifuge. As they meticulously log the final state of their model, users carefully remove the sensors, discard waste soil, and clean the model container and model preparation area. Sensors are given to CGM staff for cleaning, testing, and returning to inventory.
Data Archiving: The final stage in the experiment protocol, from the facility perspective, is the archiving of experimental data. The CGM has example data reports from which users can draw upon to create their own data log. The CGM DAQ systems include configuration spreadsheets with metadata, and users share standard sensor plan template spreadsheets where common metadata is structured following well-established procedures. The result has been a high compliance by our users to data archiving and sharing requirements/commitments. Analysis of the data produced in one experiment will typically keep at least one graduate student busy for a year; a PhD thesis typically includes two or three experiments.